Assign a Static IP Address to The Raspberry Pi
This tutorial will show you how to assign your Raspberry Pi a static IP address using the latest version of Raspbian. This tutorial assumes that you have installed the latest Raspbian / NOOBS Operating System.
This guide also assumes that you’ve connected your Pi to the network via Ethernet.
Video Tutorial:
Assign a Static IP Address to The Raspberry Pi
If you are running a recent Raspbian /etc/network/interfaces should look like the image below. If you have changed it PUT IT BACK.

Gather Information
First we need to obtain the “IP address” from our Pi. Have a pen and paper ready! . . .
From the Terminal or SSH run the following command:
ifconfig
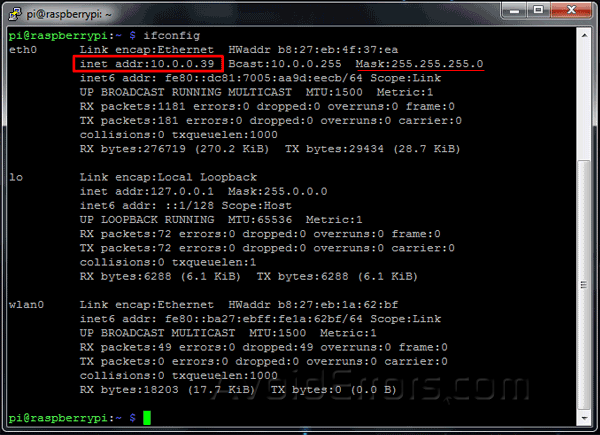
This reveals your PI’s network information, the bit you need is after eth0. Make a note of your current IP address. This is represented as follows:
inet addr: 10.0.0.39 (Pi’s Current IP Address)
We need a little more information before we proceed. enter the command:
netstat -nr
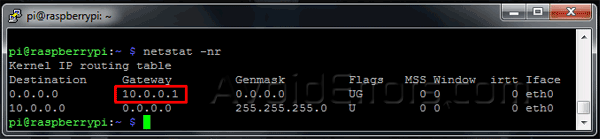
We need:
Gateway Address – 10.0.0.1
Editing Network Configuration
We now need to plug this information into the Pi’s DHCP configuration file using a text editor.
sudo nano /etc/dhcpcd.conf
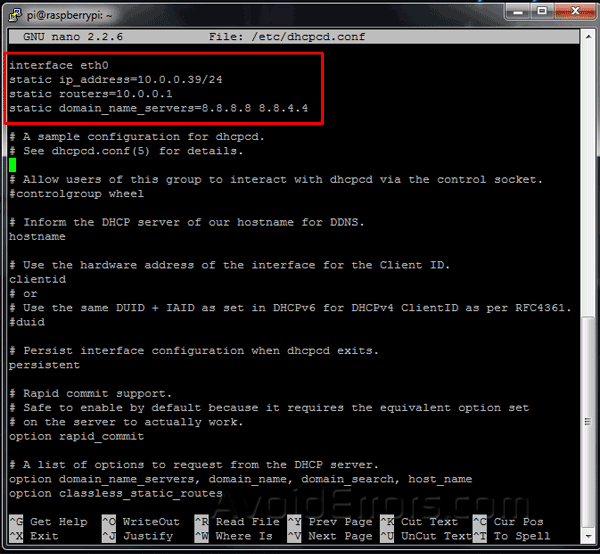
On the very top of the file type in the following lines:
interface eth0
static ip_address=10.0.0.XX/24
static routers=10.0.0.1
static domain_name_servers=10.0.0.1
Save the file by pressing Ctrl plus X, then Y for Yes, and Enter on the keyboard.
Reboot the Raspberry pi:
sudo reboot
Now you should have a static IP address assigned to the PI.


