How to Set Up Caching in WordPress
There are several caching plugins for WordPress. Among these, W3 Total Cache is a very popular choice. In today’s post, I will show you how to set up caching by using the W3 Total Cache plugin.
The first step is to install and activate the plugin on your website. Once you do that, you will find a new menu item titled “Performance” in the dashboard.
This is where you will configure all the caching options. Let’s get started with the general settings section.
General Settings
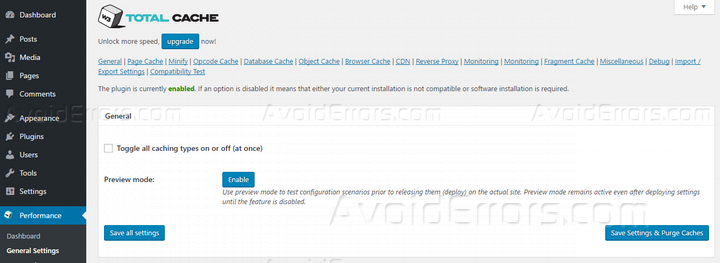
Go to Performance > General Settings. This is where you will enable different types of caching features. Once you enable the caching, you can configure the advanced options from the dedicated sub-menu of that caching type.
In the “General” section, you will find a checkbox to turn on all the caching types. You shouldn’t use this feature because different caching types are applicable for different types of hosting packages. You should only enable the caching types which work correctly with your hosting plan.
Next, there is a preview mode to help you test various caching configurations before applying these on a live website. If you are not sure about the impact of a caching type, you can test that by using the preview feature.
Click the “Save all settings” whenever you are making any changes.
Page Cache

Moving on, the next section is “Page Cache,” which is one of the most important caching features available right now. Check the “Enable” box to enable this caching.
If you are on a shared hosting, you should choose “Disk: Enhanced” as the page cache method. However, if your hosting provider complaints about excessive usage, you can switch to “Disk: Basic.”
On the other hand, those with a dedicated server or VPS should choose one of the Opcode methods.
You will find advanced page caching configuration options at Performance > Page Cache. The default settings will work best for most regular WordPress sites. If you want to make any changes here, make sure you know what you are doing.
Minify

In the “Minify” section, you can choose to reduce the size of your CSS and JavaScript files by removing the unnecessary data. This is called minifying. Check the “Enable” box, save changes, and check out if your website works perfectly.
On some occasions, the automatic minify mode may create errors for your website. In that case, choose “Manual” as the minify mode. Then, configure the minify options from the Performance > Minify page.
Database Cache
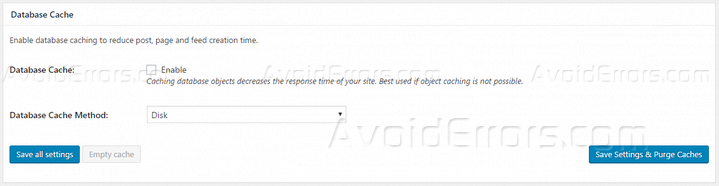
Database caching involves heavy use of the server resources. Therefore, if you are using a shared hosting, you should avoid database caching. You should enable database caching only if the server is powerful enough to handle the intense requirements of the process.
You can enable database caching by checking the “Enable” box. Then, choose the caching method depending on your hosting type.
Object Cache
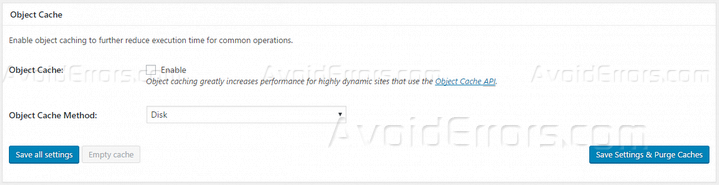
Object cache will reduce the number of database queries, thereby reducing the load on the server and increasing the loading speed. Since this caching is integrated into WordPress, you may not experience that much benefit from object caching.
However, you can enable object caching in preview mode, and check out its impact on your website. Object caching is likely to have the most positive impact on dynamic, large-scale websites that are powered by bbPress, BuddyPress, or contain a large amount of user data.
Check the “Enable” box to use this caching. Choose the caching method depending on your hosting type, and click “Save all settings.”
Browser Cache
Browser caching stores the page elements intro the web browser of the visitor. Therefore, the visitor will enjoy an enhanced loading speed on her subsequent visits to the page.
To enable browser caching, check the “Enable” box, and save the changes.
CDN

Using CDN is another useful technique to increase the loading speed of your website. If you are already using a CDN, W3 Total Cache comes with a dedicated section to integrate the caching options with your CDN service.
The plugin supports all the popular CDN services including MaxCDN, Akamai, CloudFront, and Rackspace. To start the integration process, check the “CDN” box and choose your CDN type. You can configure the CDN options at the Performance > CDN page.
Import/Export Settings
If you are using the W3 Total Cache plugin on more than one website, this section will help you copy the settings from one website to another. You will find separate fields to import or export the plugin settings.
There is another button to help you reset the plugin configuration and revert to the default settings.
Using The Extensions
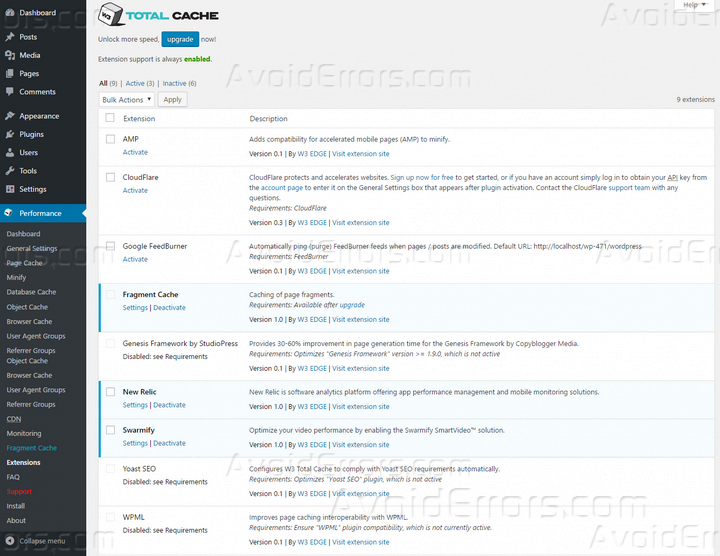
W3 Cache offers a couple of extensions to enhance the built-in features of the plugin. You will find the extensions in the Performance > Extensions page.
By default, the Fragment Cache, New Relic, and Swarmify extensions will be activated. Other extensions will help you enable AMP, connect to CloudFlare, FeedBurner, Yoast SEO, and WPML. Feel free to enable these extensions according to your requirements.
Final Words
Using a cache plugin is one of the best ways to increase the page loading speed and enhance the user experience of your WordPress site. This article provided you with a basic idea about using the W3 Total Cache plugin. Follow the steps mentioned above to get started with this caching plugin.
Do you have any other question about W3 Total Cache or the overall concept of caching in WordPress? Let me know your thoughts in the comments below.


