Dual-Boot Windows 7 and Ubuntu 12.04 Using the Wubi Installer
Want to try out Ubuntu? there is a free tool called Wubi that allows you to install Ubuntu Linux on a Windows 7 computer as if it’s a normal Windows Program. Wubi creates a boot menu that you see when you boot your computer.
This is running Ubuntu as a Windows program from within Windows – aka “WUBI”. Using WUBI is much slower and unresponsive than properly installing Ubuntu to the hard drive.
If you want to make the most of your Ubuntu in a dual-boot, do NOT use WUBI!Works just like any other Window sprogram. So, if you decide you don’t want it, you can uninstall it just like any other Windows program. Click here to Download Wubi.
Video Tutorial:
1. To start installing Ubuntu in Windows 7, I highly recommend partition drive C:
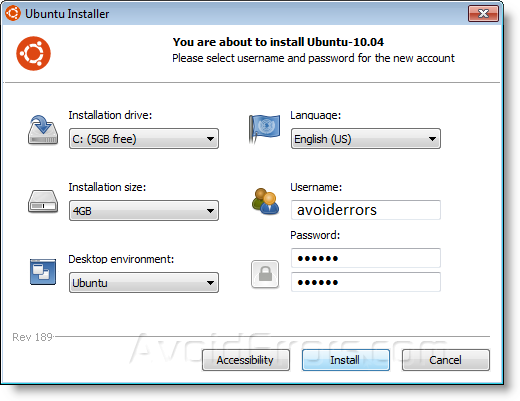
2. Double-click the file you downloaded (wubi.exe).

3. Very important choose from the Installation drive drop-down list, the partition we created in step 1.
4. Select the desired options, enter your username, and type a password in twice.
5. You can choose from the Desktop environment drop-down list different forms of Ubuntu. Each option uses a different desktop environment: Ubuntu uses Gnome, Kubuntu uses KDE, and Xubuntu and Mythbuntu uses XFCE. Mythbuntu is a media center operating system that is based on Ubuntu and integrates the MythTV Media center software as its main function.
6. Once you have selected your settings and entered your username and password, click Install.
7. The Ubuntu Installer starts downloading information on the installation files.
8. Once the installer has the information it needs, the Ubuntu ISO file is downloaded.
9. Once the ISO file is downloaded, you need to reboot your computer to continue with the installation. Select the option reboot and click Finish.
10. When the computer reboots,Windows might display the Boot Manager. Select Ubuntu from the list and press Enter.
11. The Ubuntu logo screen displays.
12. An installation system screen appears.
13. The Welcome screen displays as the installation continues.
14. The installer informs you of the progress of the installation and tells you when it will finish.
15. Once the installation is finished, the computer will reboot and the Windows Boot Manager displays again. Select Ubuntu from the list and press Enter.
16. The Ubuntu logo screen displays again. When the login screen displays, press Enter when your username is selected, enter your password, and click Log In.
17. The Ubuntu desktop displays.
If you want to go back to Windows, use the power button menu in the upper, right corner of the desktop on the top panel to reboot Ubuntu. The Windows Boot Manager displays again allowing you to select Windows.
If you decide you do not want Ubuntu on your computer anymore, you can uninstall it from within Windows just like any other Windows program.
1. Once you are back in Windows, select Control Panel from the Start menu.
2. Click the Uninstall a program link under Programs.
3. You will see Ubuntu in the list of installed programs. When you select it, you can click the Uninstall/Change button to uninstall it.
4. Wubi provides an easy way of using Ubuntu Linux.


