How to Install or Reinstall Windows 7
Installing Windows 7 is straightforward task, This step-by-step guide demonstrates how to do a clean installation of Windows 7 on a computer with one hard drive installed. This process applies for all versions of Windows 7.
Note: The best way to install Windows 7 is to do a clean install.
Before you format and install Windows 7 it is very important that you Back up your files, drivers and Windows activation.
- Backup your Windows Drivers.
- Back up your Windows 7 activation.
- Change First Boot Device in BIOS to Boot From CD/DVD.
Video Tutorial:
1. Place Windows 7 disc in your cd/dvd drive and re-start your PC.
2. Starting is going to ask you to press any key to boot from the CD/DVD press Enter key on your keyboard. If it doesn’t show you would need to Change First Boot Device in BIOS to Boot From CD/DVD.

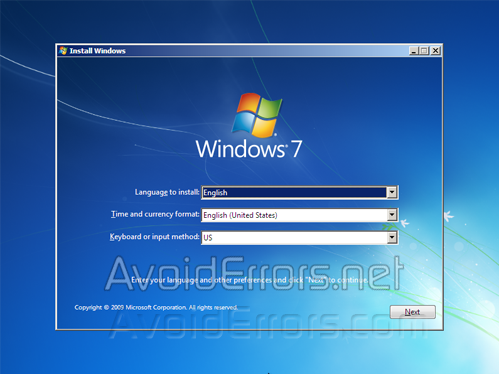
3. The next screen select language, time and, keyboard or input method. Choose your required settings and click next to continue.
4. On the next screen Click on “Install now” to install Windows 7.

5. Read the license terms and check mark “I accept license terms”. Then click next to continue.

6. You will be prompted with two options. Upgrade or Custom (Advanced). Since we are doing a clean install we will select Custom (Advanced).

7. If you have a previous Windows operating system installed it would look like the following image:
In our installation we are doing a clean install so you need to delete drive partition so click Drive options (advance).

8. Select the (C:) partitions usually called “Disk 0 Partition 1 System Reserved“ and “Disk 0 Partition 2”click on Delete.

9. A pop up will appear to warn you that the partition might contain recovery files and system files. Confirm the deletion, Click on OK. Not to worry cause the installation will re-create all system files.
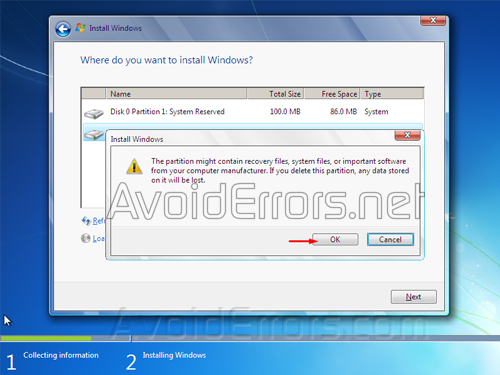
10. Do the same with the System Reserved partition. delete it, and click on ok when prompted with the confirmation pop up.

11. Once the partitions have been deleted you should see only one Unallocated disc, choose the unallocated Disk and click next to install Windows 7.

12. Windows 7 installation process will start copying all the necessary files to your hard drive as shown on the image below.

13. The computer system will re-boot several times, do not press any key during the boot process so Windows 7 will continue with the installation.

14. After the reboot your computer will be prepared for first use.

15. Enter a user name and computer name. Click next to continue. The user account you create here is the Administrator account which is the main account for your Windows 7 that has all the privileges.

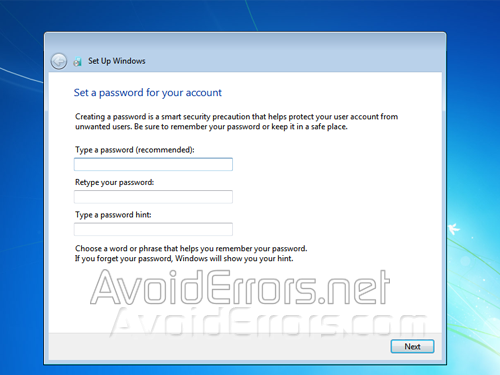
16. Enter a password and password hint just in case you forget your password.
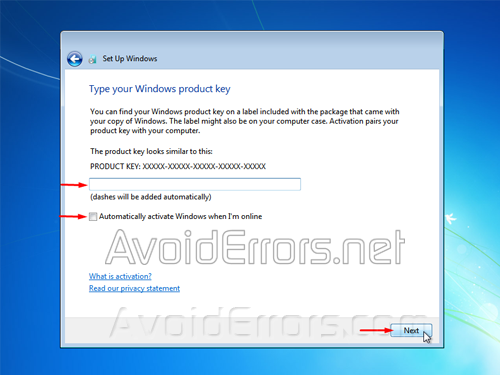
17. Type the product key that came with Windows 7 and click next. If you do not enter the product key you can still proceed by clicking on next button.
18. Help protect your computer and improve Windows automatically. Choose Use recommended settings.

19. Review your time and date settings. Select your time zone, correct the date and time and click next to continue.

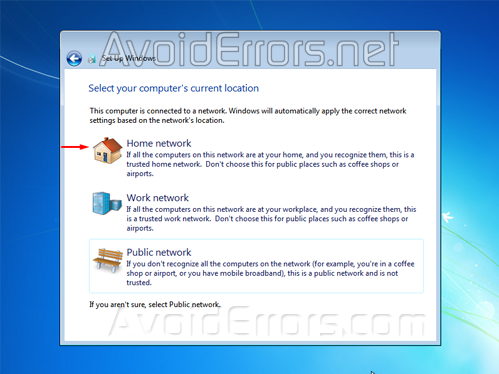
20. Select your computer’s current location. If you are a home user then choose Home network otherwise select the appropriate option.
21. Windows will now finalize the settings for your computer and restart.

22. After the final restart Windows 7 will start to boot up.

23. If you placed a password in the installation process you’ll be prompted to enter a password at the logon screen. If not then it will take you straight to your desktop.

24. After you have logged on to Windows 7 start using your computer.


