How to Install FreeNAS on Hypervisor ESXI
FreeNAS can be run virtually inside Hypervisor ESXI and can be used in a production environment, you will need to create a virtual machine that meets the following minimum requirements:
at least 8 GB of RAM
a virtual disk at least 4 GB in size to hold the operating system
at least one more virtual disk at least 10 GB in size to be used as data storage
Let’s create a virtual machine for FreeNAS within VMware ESXi.
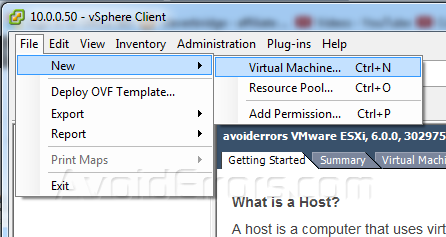
1. Create a new virtual machine, click File → New → Virtual Machine.
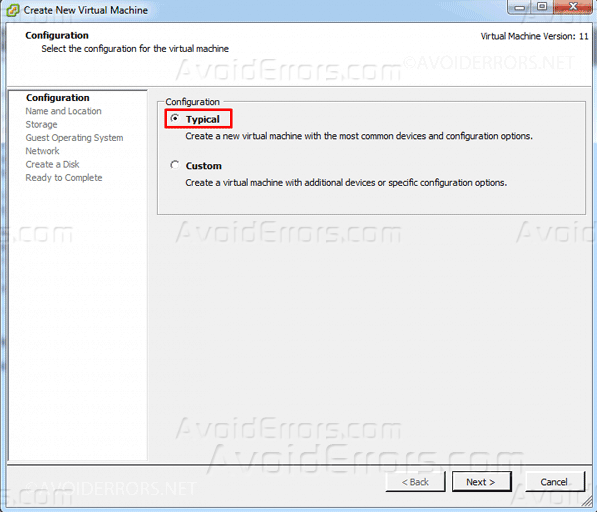
2. The New Virtual Machine wizard will launch, here select the typical configuration and Click “Next”.
3. Input a name for the virtual machine.

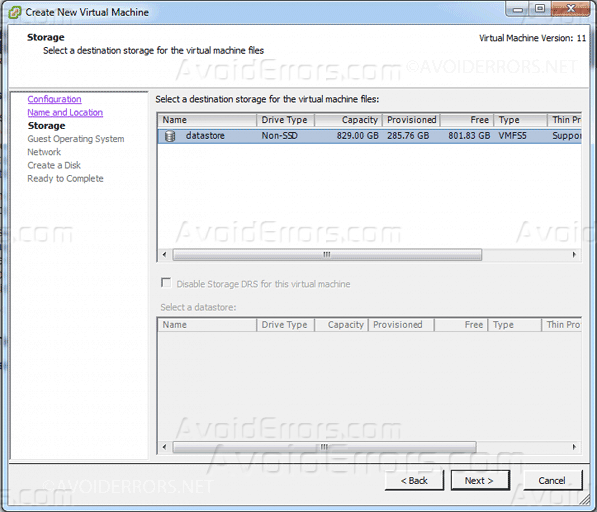
4. Select a datastore.
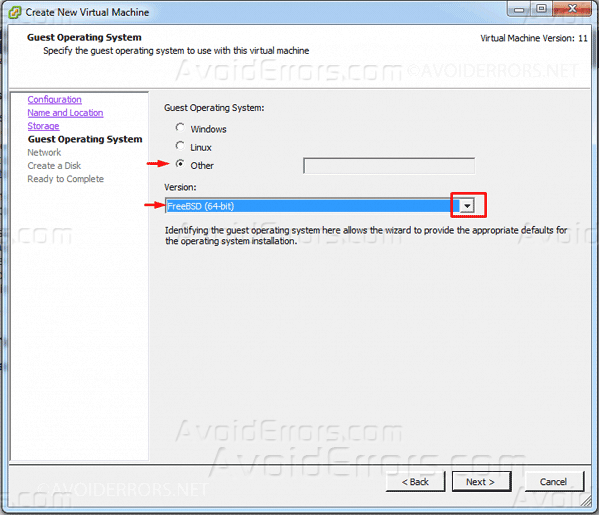
5. In the screen shown underneath, select Other guest operating system then select a FreeBSD (64bit) as version.
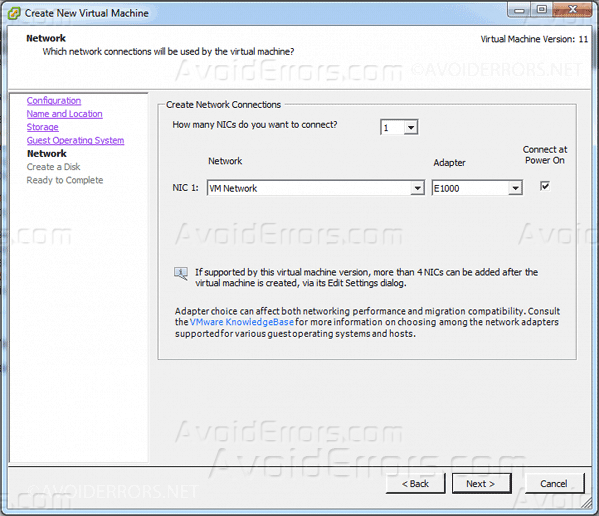
6. Select the default pre-selected network settings. Click “Next”.
7. Create a virtual disk of at least 6 GB to hold the FreeNAS operating system, as shown:

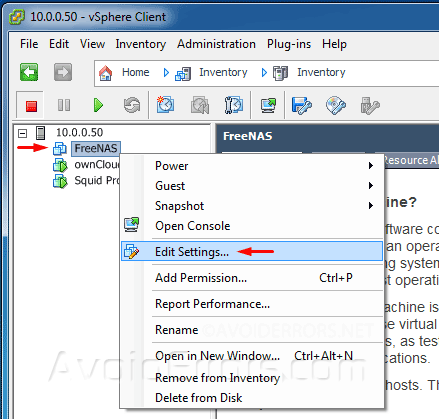
8. Click “Next” and “Finish”. Your virtual machine will be listed on the left pane. Right-click the newly created virtual machine and select “Edit Settings“.
9. Here Increase the “RAM Memory” to at least 8 GB, Under “CPUs”, make sure that only 1 CPU is listed.
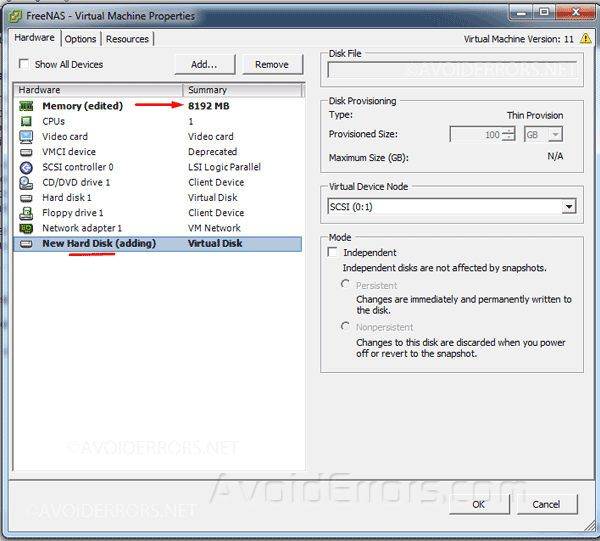
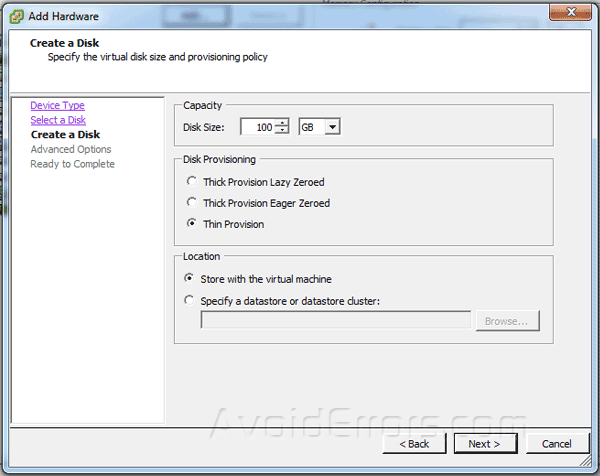
10. Create a storage disk, click the Add button. In the “Device Type” menu, select “Hard Disk” and click “Next”. Select “Create a new virtual disk” and click “Next”. Select the size of the disk as shown in the image underneath. Select Thin Provision. Click “Next”, then “Next” and”Finish” to create the disk. Repeat the same process to create as many storage disks needed to meet your requirements.
We have finished with the first part of creating a VM in Hypervisor ESXI for our FreeNAS. Now we need to install FreeNAS on that VM.
1. Download the FreeNAS ISO.
2. Let’s attach the FreeNAS ISO to the VM. Select the VM you just created for FreeNAS → launch VM console → power on the machine → attach the ISO.

3. Once the disc has been attached/connected send a Ctrl+Alt+Del to reboot and it would automatically boot from the ISO.

4. Hit enter to start the installation process.

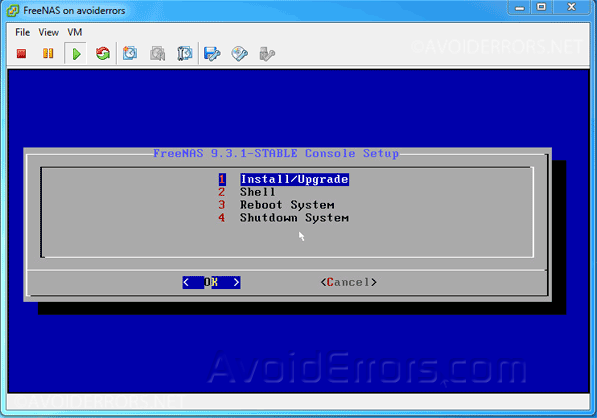
5. Using the arrow keys on your keyboard select Install/Upgrade and press enter.
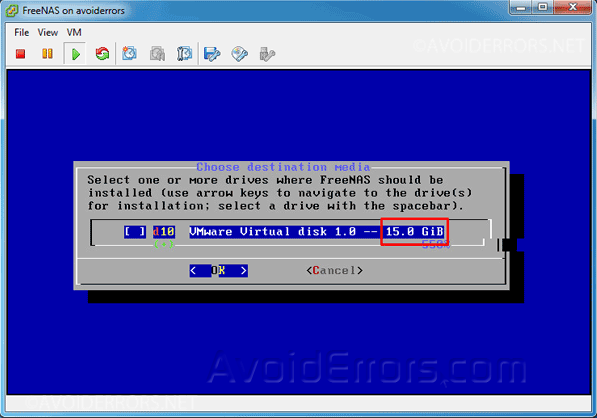
5. Here in the “destination media window” be sure to select the disk you created for your operating system by pressing the space bar and enter.
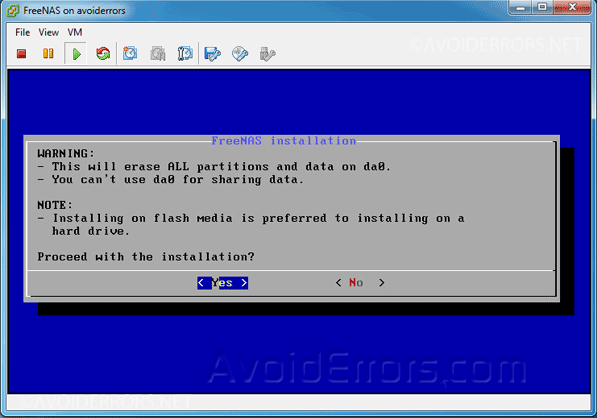
6. Read this carefully once done press enter. Because you created this virtual hard disk there is no data loss.
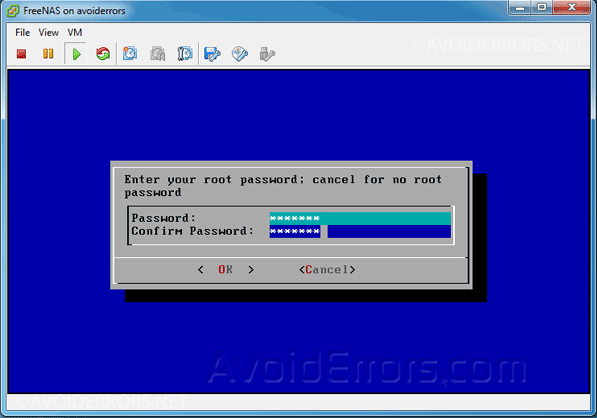
7. Create a password for the root user.
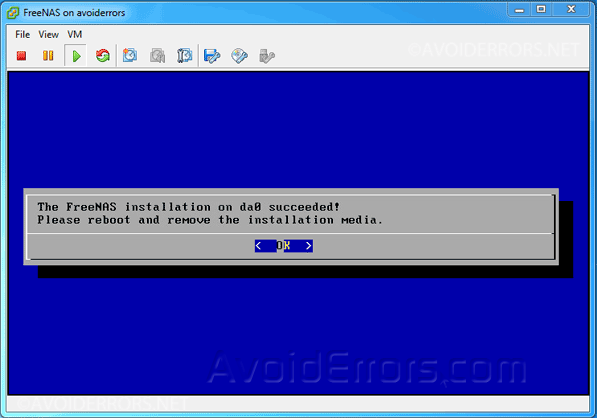
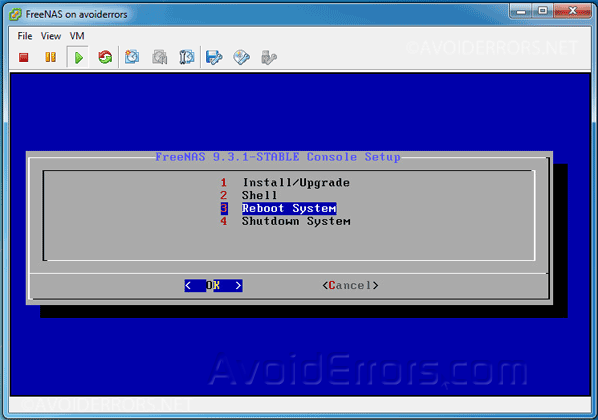
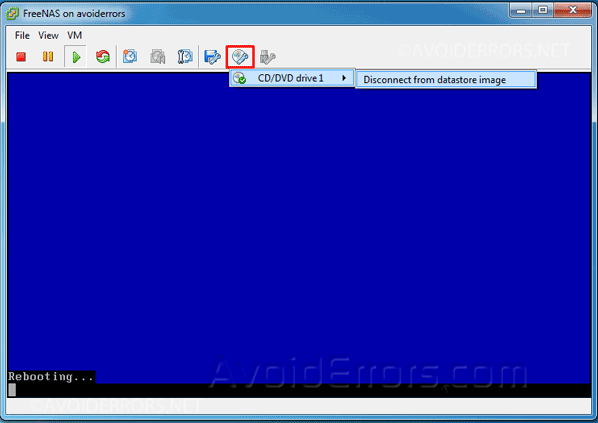
8. Once the installation has finished, reboot and remove the installation ISO.
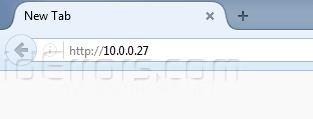
9. Upon reboot you’ll be prompted with the IP address of the FreeNAS server.
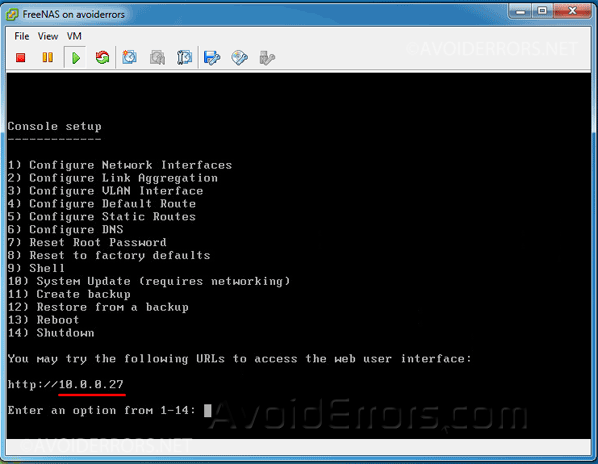
10. Enter that IP in the address bar to log in.
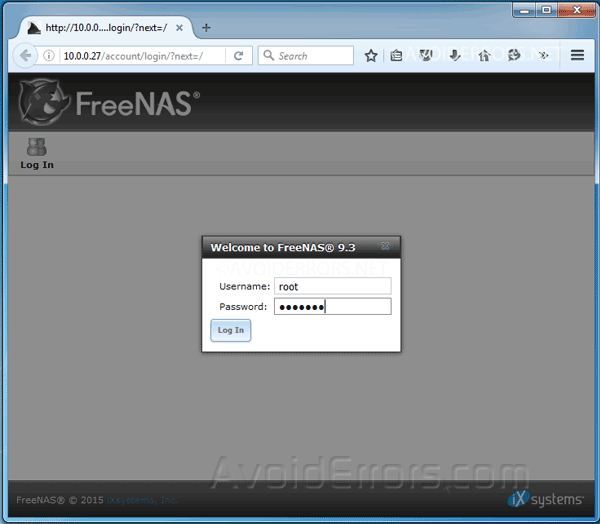
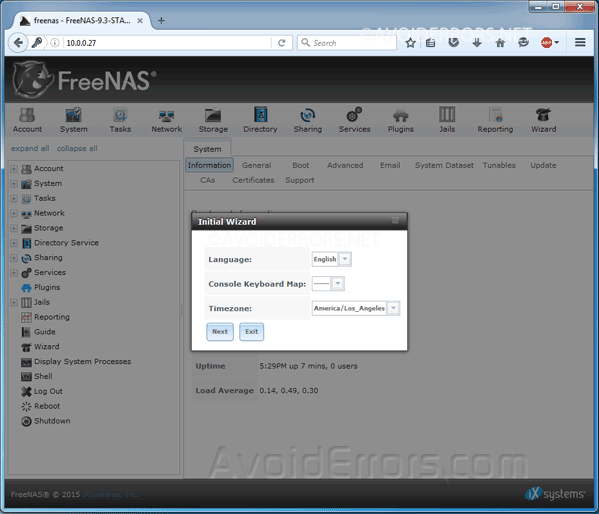
11. Finally, enter the username and password you created while the installation process, then you’ll be able to manually or use the wizard to configure FreeNAS.
Video Tutorial:


