How to Install OpenVPN Server on Ubuntu 16.04
OpenVPN is an open source application which is widely used to create secure virtual private networks over unsecured public Internet. OpenVPN is SSL VPN solution which tunnels your network connection securely through the Internet. OpenVPN works on client-server architecture.
All the devices connected to a virtual private network behaves as if they are connected to a local area network. The packets sent through the VPN tunnel are encrypted with 256 bit AES encryption making data theft impossible.
In this tutorial, we will explain how to install OpenVPN server on Ubuntu 16.04 step by step.
Install OpenVPN
1. Update all your current system packages by using the command below.
sudo apt-get update

2. Now, install the required packages that we will use to setup OpenVPN server, run the below command on Terminal.
sudo apt-get install -y openvpn easy-rsa

3. Now we will copy “easy-rsa” template that we just installed to a new directory, use the below two commands to create the directory and its certificate.
sudo make-cadir /var/openvpn-ca
cd /var/openvpn-ca

4. Open “Vars” with nano editor, and edit like the below screenshot.

4. Once you are done use the variable values to generate CA certificate but first source it by the below command.
source ./vars

5. Clean the environment by the below command.
./clean-all
6. Build the root certificate by the below command, it will prompt to change the variables simply press Enter.
./build-ca

7. Now create your server certificate and the key by using the below command.
sources ./vars
./build-key-server server

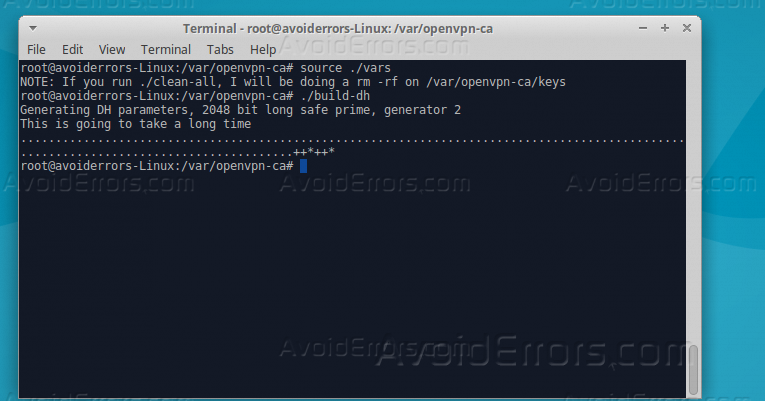
8. Now you have to generate a strong Diffie-Hellman key, which will be used during key exchange, do that by the commands below.
source ./vars
./build-dh
9. Create a certificate and key for the clients by the following commands.
source ./vars
./build-key client
./build-key-pass client

10. You have to copy the CA & server certificates same as the keys to “OpenVPN” directory, copy by the below commands.
cd /var/openvpn-ca/keys
cp ca.crt ca.key server.crt server.key dh2048.pem /etc/openvpn

11. Time to extract “OpenVPN” configuration and copy it to its directory by the below commands.
gunzip -d /usr/share/doc/openvpn/examples/sample-config-files/server.conf.gz
cp /usr/share/doc/openvpn/examples/sample-config-files/server.conf /etc/openvpn

12. Open the configuration file with nano editor by the below command.
sudo nano /etc/openvpn/server.conf
13. Remove the highlighted lines on the below screenshot then save and exit the file.

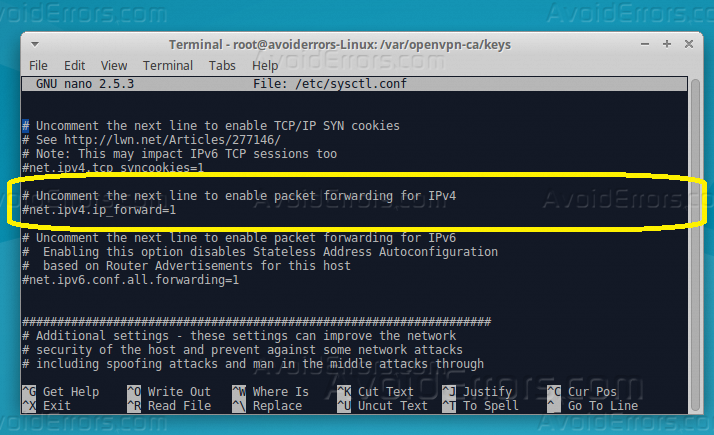
14. Now modify the configuration file “/etc/sysctl.conf” by the below command, and uncomment the highlighted lines.
sudo nano /etc/sysctl.conf
15. Start the VPN server using the below command.
sudo systemctl start openvpn@server
16. And use the below command line to enable the VPN with the boot time.
sudo systemctl enable openvpn@server
17. Now check the current status of VPN server by the below command.
sudo systemctl status openvpn@server


Awesome post mate! However, there are lots of permission denied errors I have encountered. I needed to use the “sudo chmod 777 -R /path” to change permissions. Please include the commands for those errors. All in all this is a good and very useful post. Thanks mate!