Translate WordPress Theme into any Language
By default WordPress themes language are in English, so if we need to translate WordPress theme language we would need to access our web host and manually create a .po and .mo file in the languages directory or we could do it automatically using a WordPress plugin called Codestyling Localization.
This Plugin translate WordPresss themes and plugins. I’m also going to show you what to do if the plugin doesn’t work immediately.
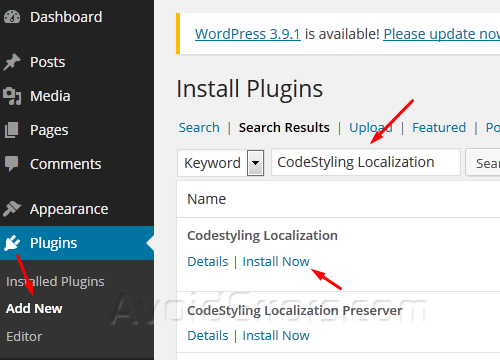
1. We need to install the Codestyling Localization plugin to your WordPress:
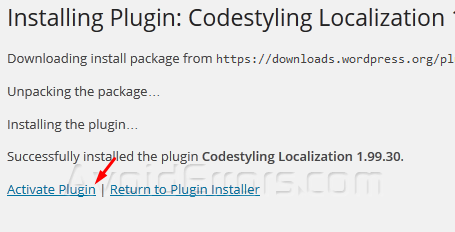
Form the WP Dashboard, go to Plugins, then click Add New, and search for Codestyling Localization. Click Install Now to install the plugin and Activate Plugin.
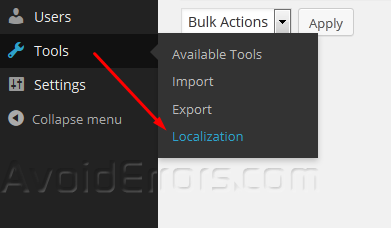
2. Once activated, go to Tools, then click on Localization.
3. If you see “The US version doesn’t contain the language directory” message, click the button to create the language directory.
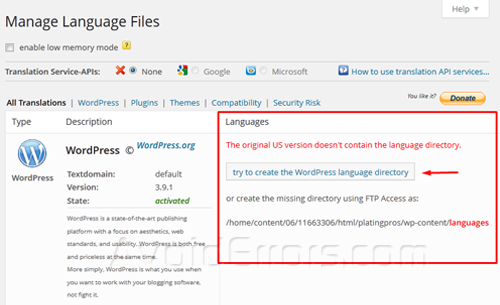
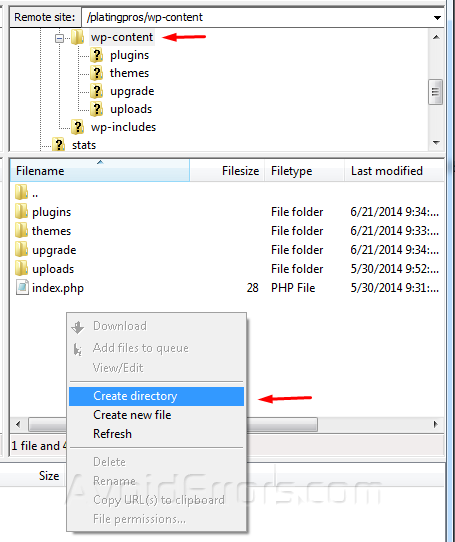
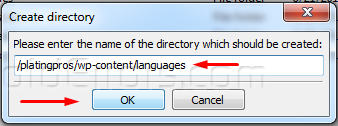
4. If that fails, use an FTP client to connect to your web host and create the languages directory wp-content/languages (languages should be plural).
Note: Since we are translating the theme we would need to create the languages directory inside wp-content/themes/your WP theme/languages (languages should be plural)
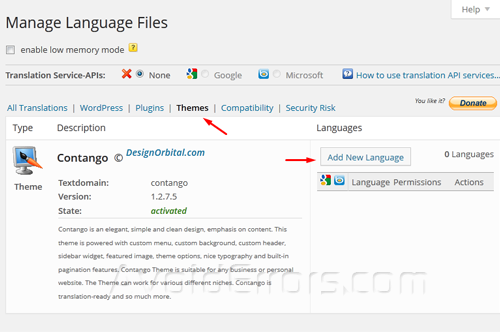
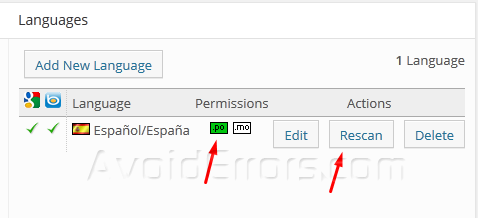
5. Now we need to create a PO and MO files in the language directory. Since we are translating the Theme language select Themes tab from the navigation menu and Add New Language button.
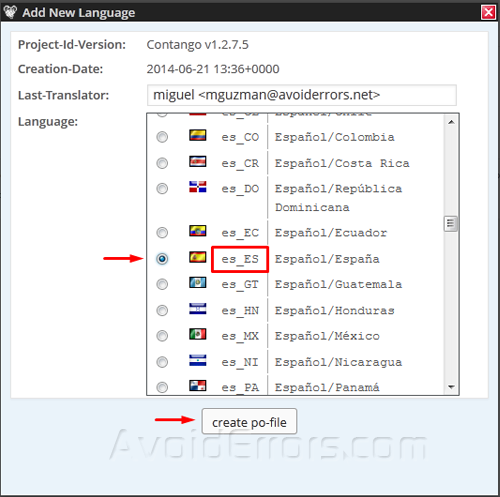
6. Choose the translated language you want and Click create-po-file button.
Note: You need to write down the language abbreviation next to the flag in case it doesn’t work, we would need this to add it to the wp-config.php file to make it work.
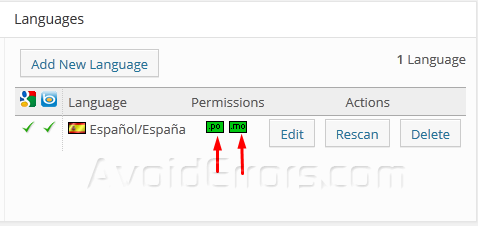
7. Once the PO file is created you’ll see a green box for the po and a white box for the mo. Click on Rescan to scan for all non-translated words.
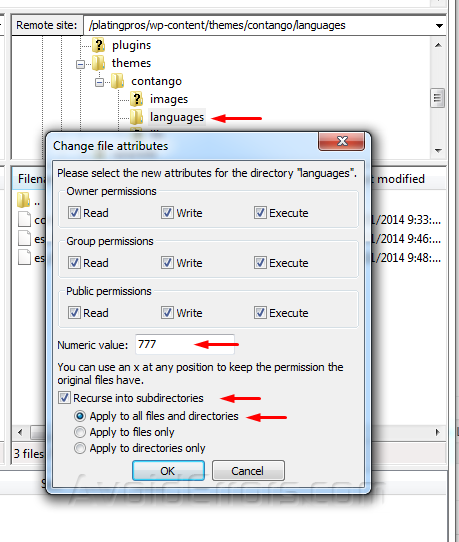
8. If the po box is red, it means you don’t have proper permissions to write to the file. Clicking the red box should fix it, but if it doesn’t, you can manually change the permissions using an FTP client navigate to wp-content/ or wp-content/themes/your WP theme name directory, right click Languages and click on File permissions… Change the Numeric value to 777 and click OK.
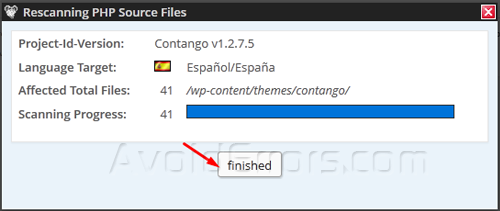
9. Now once the Rescanning finished click on Edit.
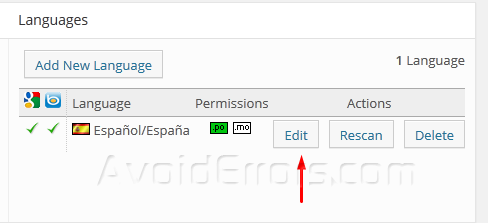
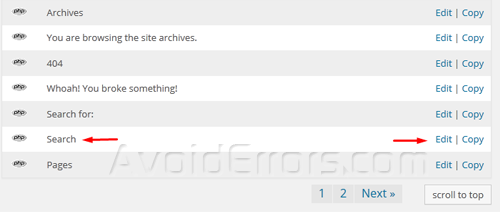
10. Search for the words or text you need to change.
11. In my tutorial I’ll Scroll down the list, and find the “Search” word and click the edit button on the right side.
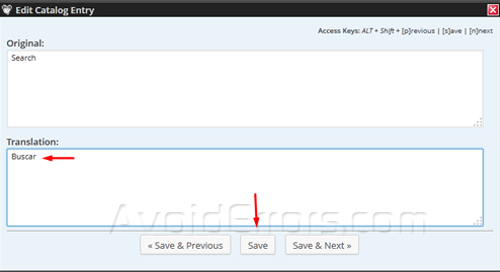
12. Translate the word you want and then click Save.
13. Scroll up to the top of the page and click generate mo-file. You’ll get date-time confirmation of when it was last written to the right of the button, replacing the unknown word for a date-time.

14. If mo box is green, everything is good. If it’s red, Refer to Step 8.
15. Now go to your website and your WordPress site should be translated.

16. If is not translated try refreshing your site, if that doesn’t work we need to edit the WPLANG.
To Edit WordPress WPLANG:
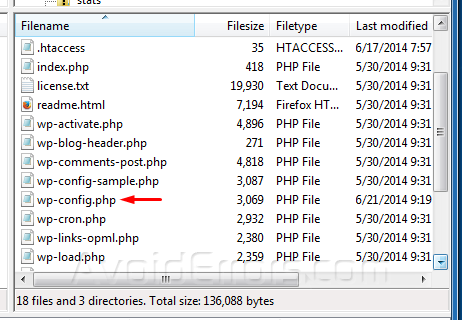
1. Using an FTP client navigate to the root directory of your site, locate the wp-config.php right click and select View/Edit from the context menu.
2. Locate define (‘WPLANG’ , ‘ ‘); and place the abbreviation of you language in between the quotes. Like this: define (‘WPLANG’ , ‘es_ES ‘)
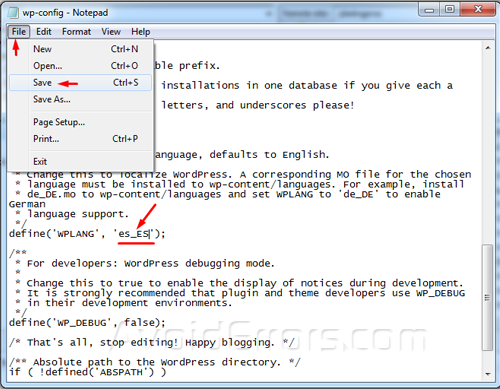
3. Save the changes and refresh your site. you should be able to see the translation.
Video Tutorial:


